5 Easy Steps to Install a Keyless Entry System Security

Yardlock STEP By Step Installation Guide
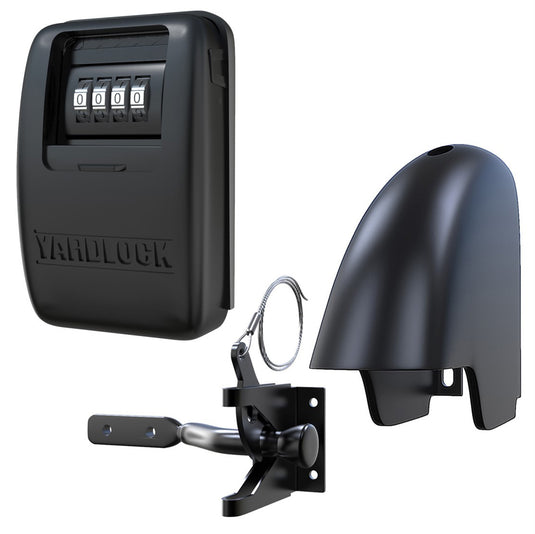
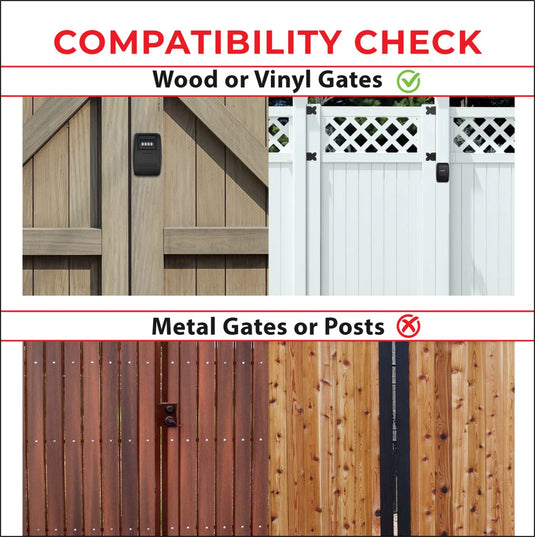
Upgrading your outdoor security shouldn’t feel like rewiring a spaceship. Keyless entry systems are a simple and powerful way to improve security for a side gate, a shed in the rear, or a fence in the front yard. Yardlock is one of the most trusted names on the market when it comes to keyless gate locks that are strong and weatherproof and made for outdoor use.
This article will show you five simple steps to set up a keyless entry system, using Yardlock's combination gate lock as an example. We'll use the official Yardlock installation video to break it down and explain why this product is a fantastic choice for homeowners who want security without any trouble. Also, we'll tell you some shocking things regarding burglaries and gate security to help you make a smart choice.
Why Go Keyless?
You're living in the past if you still have to fumble with metal keys to get into your shed or yard in 2025. Keyless entry solutions take away that stress. No more worrying about who has a copy or hiding spares beneath rocks. You can get into your space easily with a keyless lock like Yardlock's gate system. It's quick, reliable, and safe.
Safety is important, and you shouldn't have to give it up for convenience. Let’s walk you through the full installation process so you can lock down your property with confidence.
Keyless Lock Complete Installation Guide
Step 1: Prepare Your Tools and Work Area
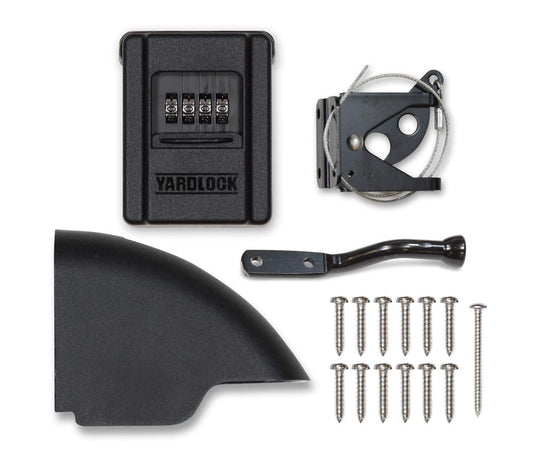
Take some time to get your tools and work area ready before you start working on the lock. You will need a power drill, a screwdriver, a pencil, a tape measure, and the Yardlock system itself. Pick a clear, dry day to install so that your surfaces are clean and ready to go. The entire setup takes around 15–30 minutes depending on your gate type, so it’s a quick afternoon project that pays off long-term.
Remove any dust or dirt from the area where the gate and post will be installed. You want a flush, even surface when placing your latch and mounting points. Since security begins with the foundation, think about fixing any warped or broken wood first.
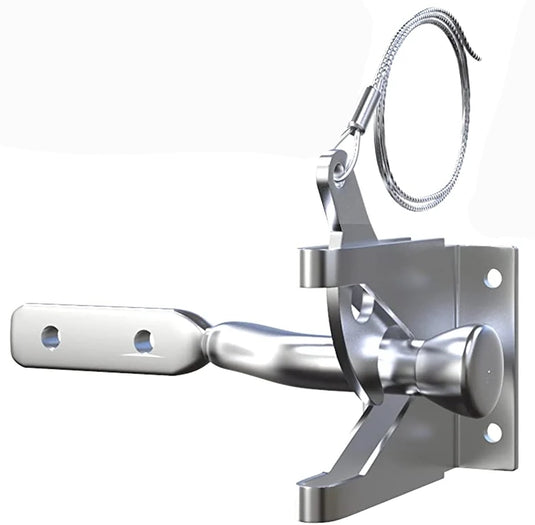
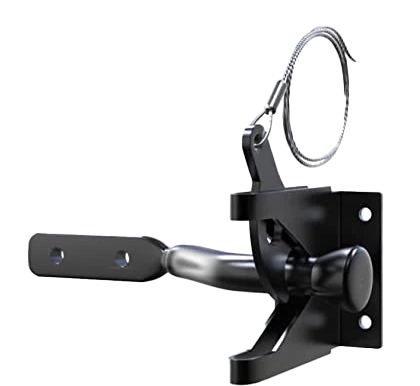
Step 2: Position the Latch Mechanism
Now let’s get into the hardware. To begin, place the latch plate on the edge of the gate where it closes. To see the whole range of motion, pull the latch forward. Then, gently close the gate so you can indicate where the latch hits the post.
With a pencil, draw a line between the two holes where the screws will hold the latch in place. This is a very important step. If the latch is not centered, the lock won't fit well afterward. Check to see whether it is not skewed or slanted. Use your drill to make two pilot holes at the areas you marked. This makes it less likely that the wood will crack when you add screws.
Now, line up the latch again and screw it in. The clasp should be tight yet still spring back easily when you pull it. You’re halfway there.
Featured article: How To Choose The Best Outdoor Lock For Your Home [Weatherproof And Secure
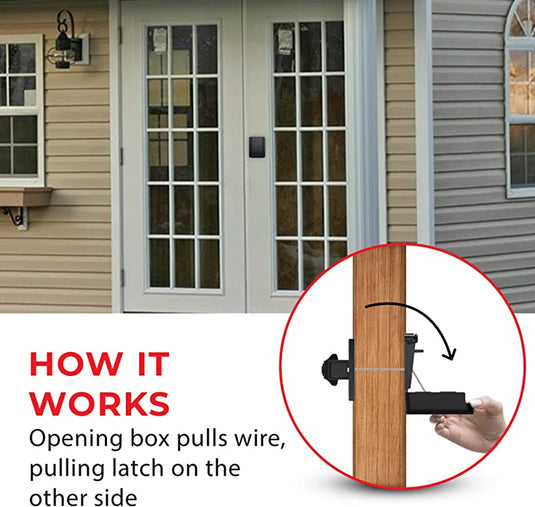
Step 3: Install the Cable Loop Anchor
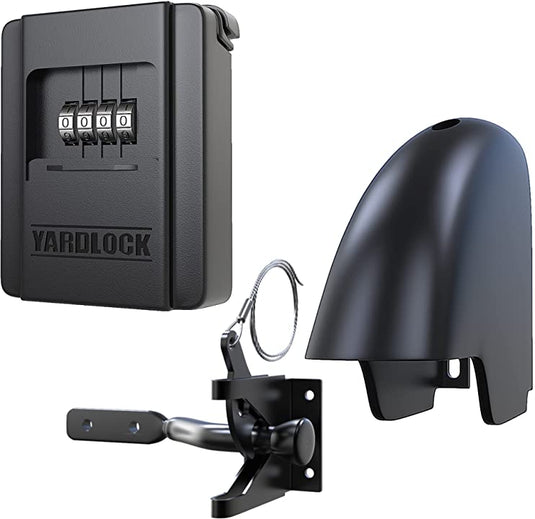
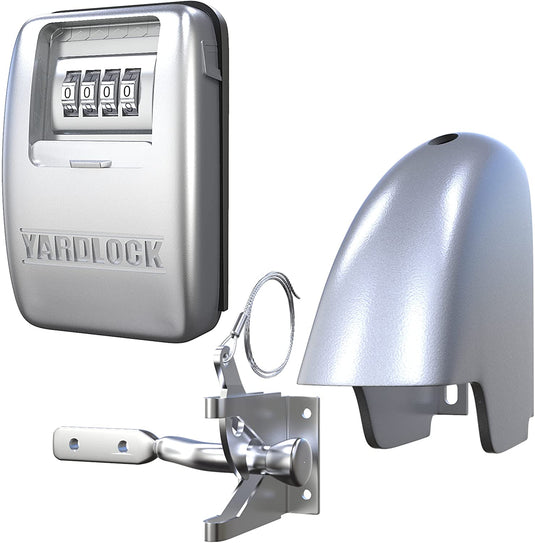
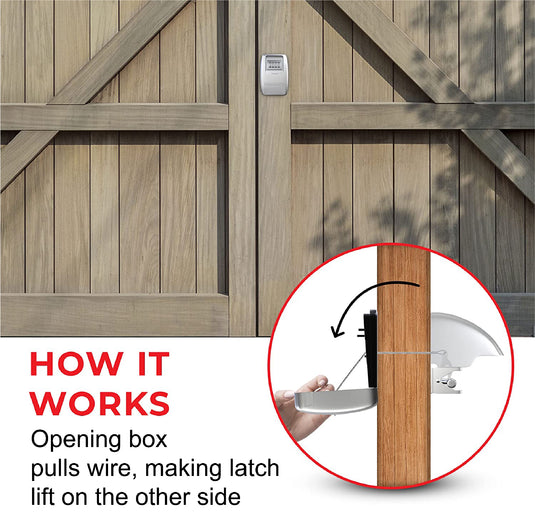
This is what makes Yardlock different from most regular padlocks. Yardlock doesn't just employ the lock body; it also uses a sturdy, weatherproof steel cable that attaches to the post or permanent wall next to your gate.
Put the looped end of the cable around the latch pin and hold the bracket against the post with the gate closed and the latch in place. It should pull tight, but it shouldn't change the way the latch works. Use your pencil to mark the two screw holes for the bracket once it is in place.
Drill your pilot holes again, and then screw the anchor plate into the post. The cable loop should stay in place once it's installed, with enough strain to maintain the lock in the middle when it's engaged. This configuration makes sure that the lock falls into position on its own, so you don't have to line it up every time.
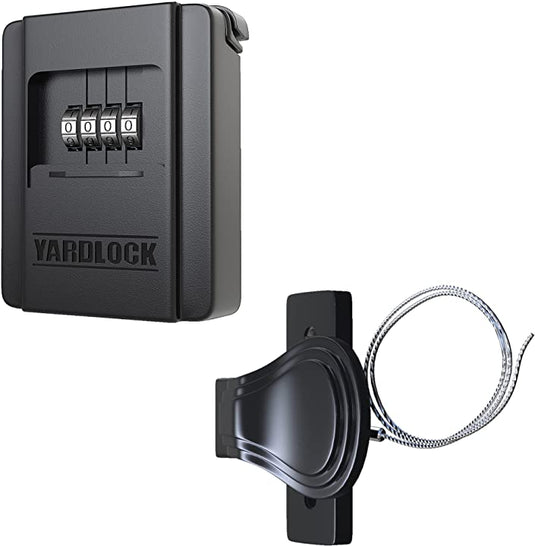
Step 4: Attach the Yardlock Combination Lock
With both the latch and cable installed, it’s time for the main attraction. Get your Yardlock and pull the latch pin out. You should see that the lock has a big slot that lets the pin glide through. Put the lock through the latch, let go of the pin, and check that the lock is securely in place.
To lock it, scramble the dial. You did it right if the lock clicks and stays open. To unlock it, type in your 4-digit code again and hit the release button. It shouldn't take much force to open the lock. Do this a few times to make sure the mechanism works well.
This is the point where function and satisfaction meet: you've gone keyless, and it works perfectly.
Step 5: Set Your Combination Code and Test Everything
The Yardlock combination gate lock comes with a common code (typically 0-0-0-0), but you should alter this right away. Follow the instructions in the product booklet to reset the lock. Usually, this means holding the pin, typing in a new code, and then letting go of the pin to set it.
Close and lock the code, then mix up the dials to make sure it's right. To open it again, type in your new code again. Do the procedure a few times. You don't want to get locked out because you didn't test the new combination right.
You're ready to go once you're sure the code works and the lock clicks into place smoothly. You now have your Yardlock gate lock fully installed, operational, and safeguarding your property without the need for a key. Also, you can watch the video tutorial for a more detailed guide if you are stuck at any step while installing.
Why Yardlock Stands Out
The beauty of Yardlock’s system is that it’s truly weatherproof, tamper-resistant, and low-maintenance. Their flagship product is perfect for outdoor gates where electricity isn't always available because it doesn't require batteries or Wi-Fi. The heavy-duty dial and cable keep attackers from getting in, and the stainless-steel interior parts don't rust or break down.
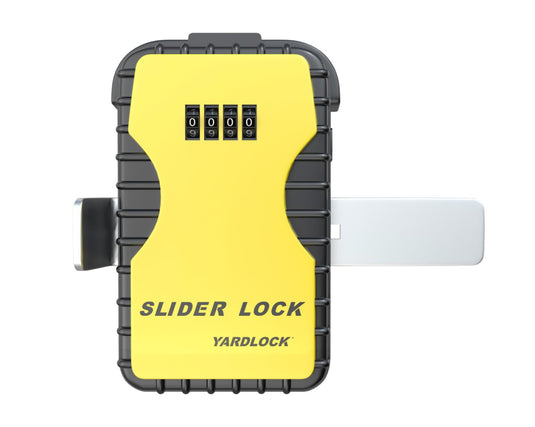
If you're looking for other options, Yardlock also offers combination shed locks, patio locks, and even slider locks—all keyless and built for real-life outdoor environments. You can explore their full lineup at yardlock.com/collections/all.
Yardlock Premium Products
This table highlights main Yardlock products, their core features, and how they fit different needs.
|
Product Name |
Best For |
Material |
Key Feature |
Weather Resistance |
|
Yardlock Gate Lock |
Residential yard gates |
Zinc die-cast with composite shell |
One-hand operation from either side |
Weather-proof, freeze-proof |
|
Gate Lock XLS |
Larger gates, high security |
Zinc/composite with steel arm |
Extra-strong latch for wide post compatibility |
Rust-resistant, all-weather |
|
Gate Lock XLB |
Universal lock + latch combo |
Zinc with integrated latch system |
Combines lock & latch in one body |
Weather-proof & durable |
|
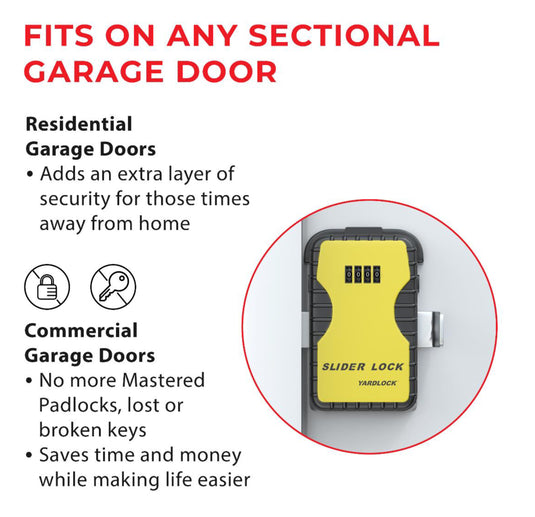
Slider Lock |
Sliding doors, garages |
Die-cast zinc & stainless steel |
Designed for garage and track-style gates |
Outdoor-rated, corrosion-safe |
Keeping Your System in Shape
Installing your Yardlock is only step one. The key to long-term performance is to keep it clean, tested, and oiled. Once a season, spritz it lightly with silicone lubrication. Wipe it down once a month in places where it rains or is damp, and make sure the combination dial hasn't rusted or gotten stiff.
Check that the screws are snug and the cable loop isn't frayed every six months. If you ever want to move the lock to a different gate or shed, just take it off and put it back on using the same instructions as above.
Featured article: Why Keyless Locks Are The Future Of Home Security?
Final Thoughts: Is Yardlock Right for You?
If you’re tired of keys, worried about break-ins, or just want to modernize your gate, Yardlock offers a practical and affordable solution. It is easy to install, doesn't need a locksmith, and gives you peace of mind right away.
You don't need an app. No batteries are needed. You only need a gate, 30 minutes, and the desire to make your home safer.
So whether you live in a quiet neighborhood or a bustling metro area, this upgrade is one you’ll never regret.